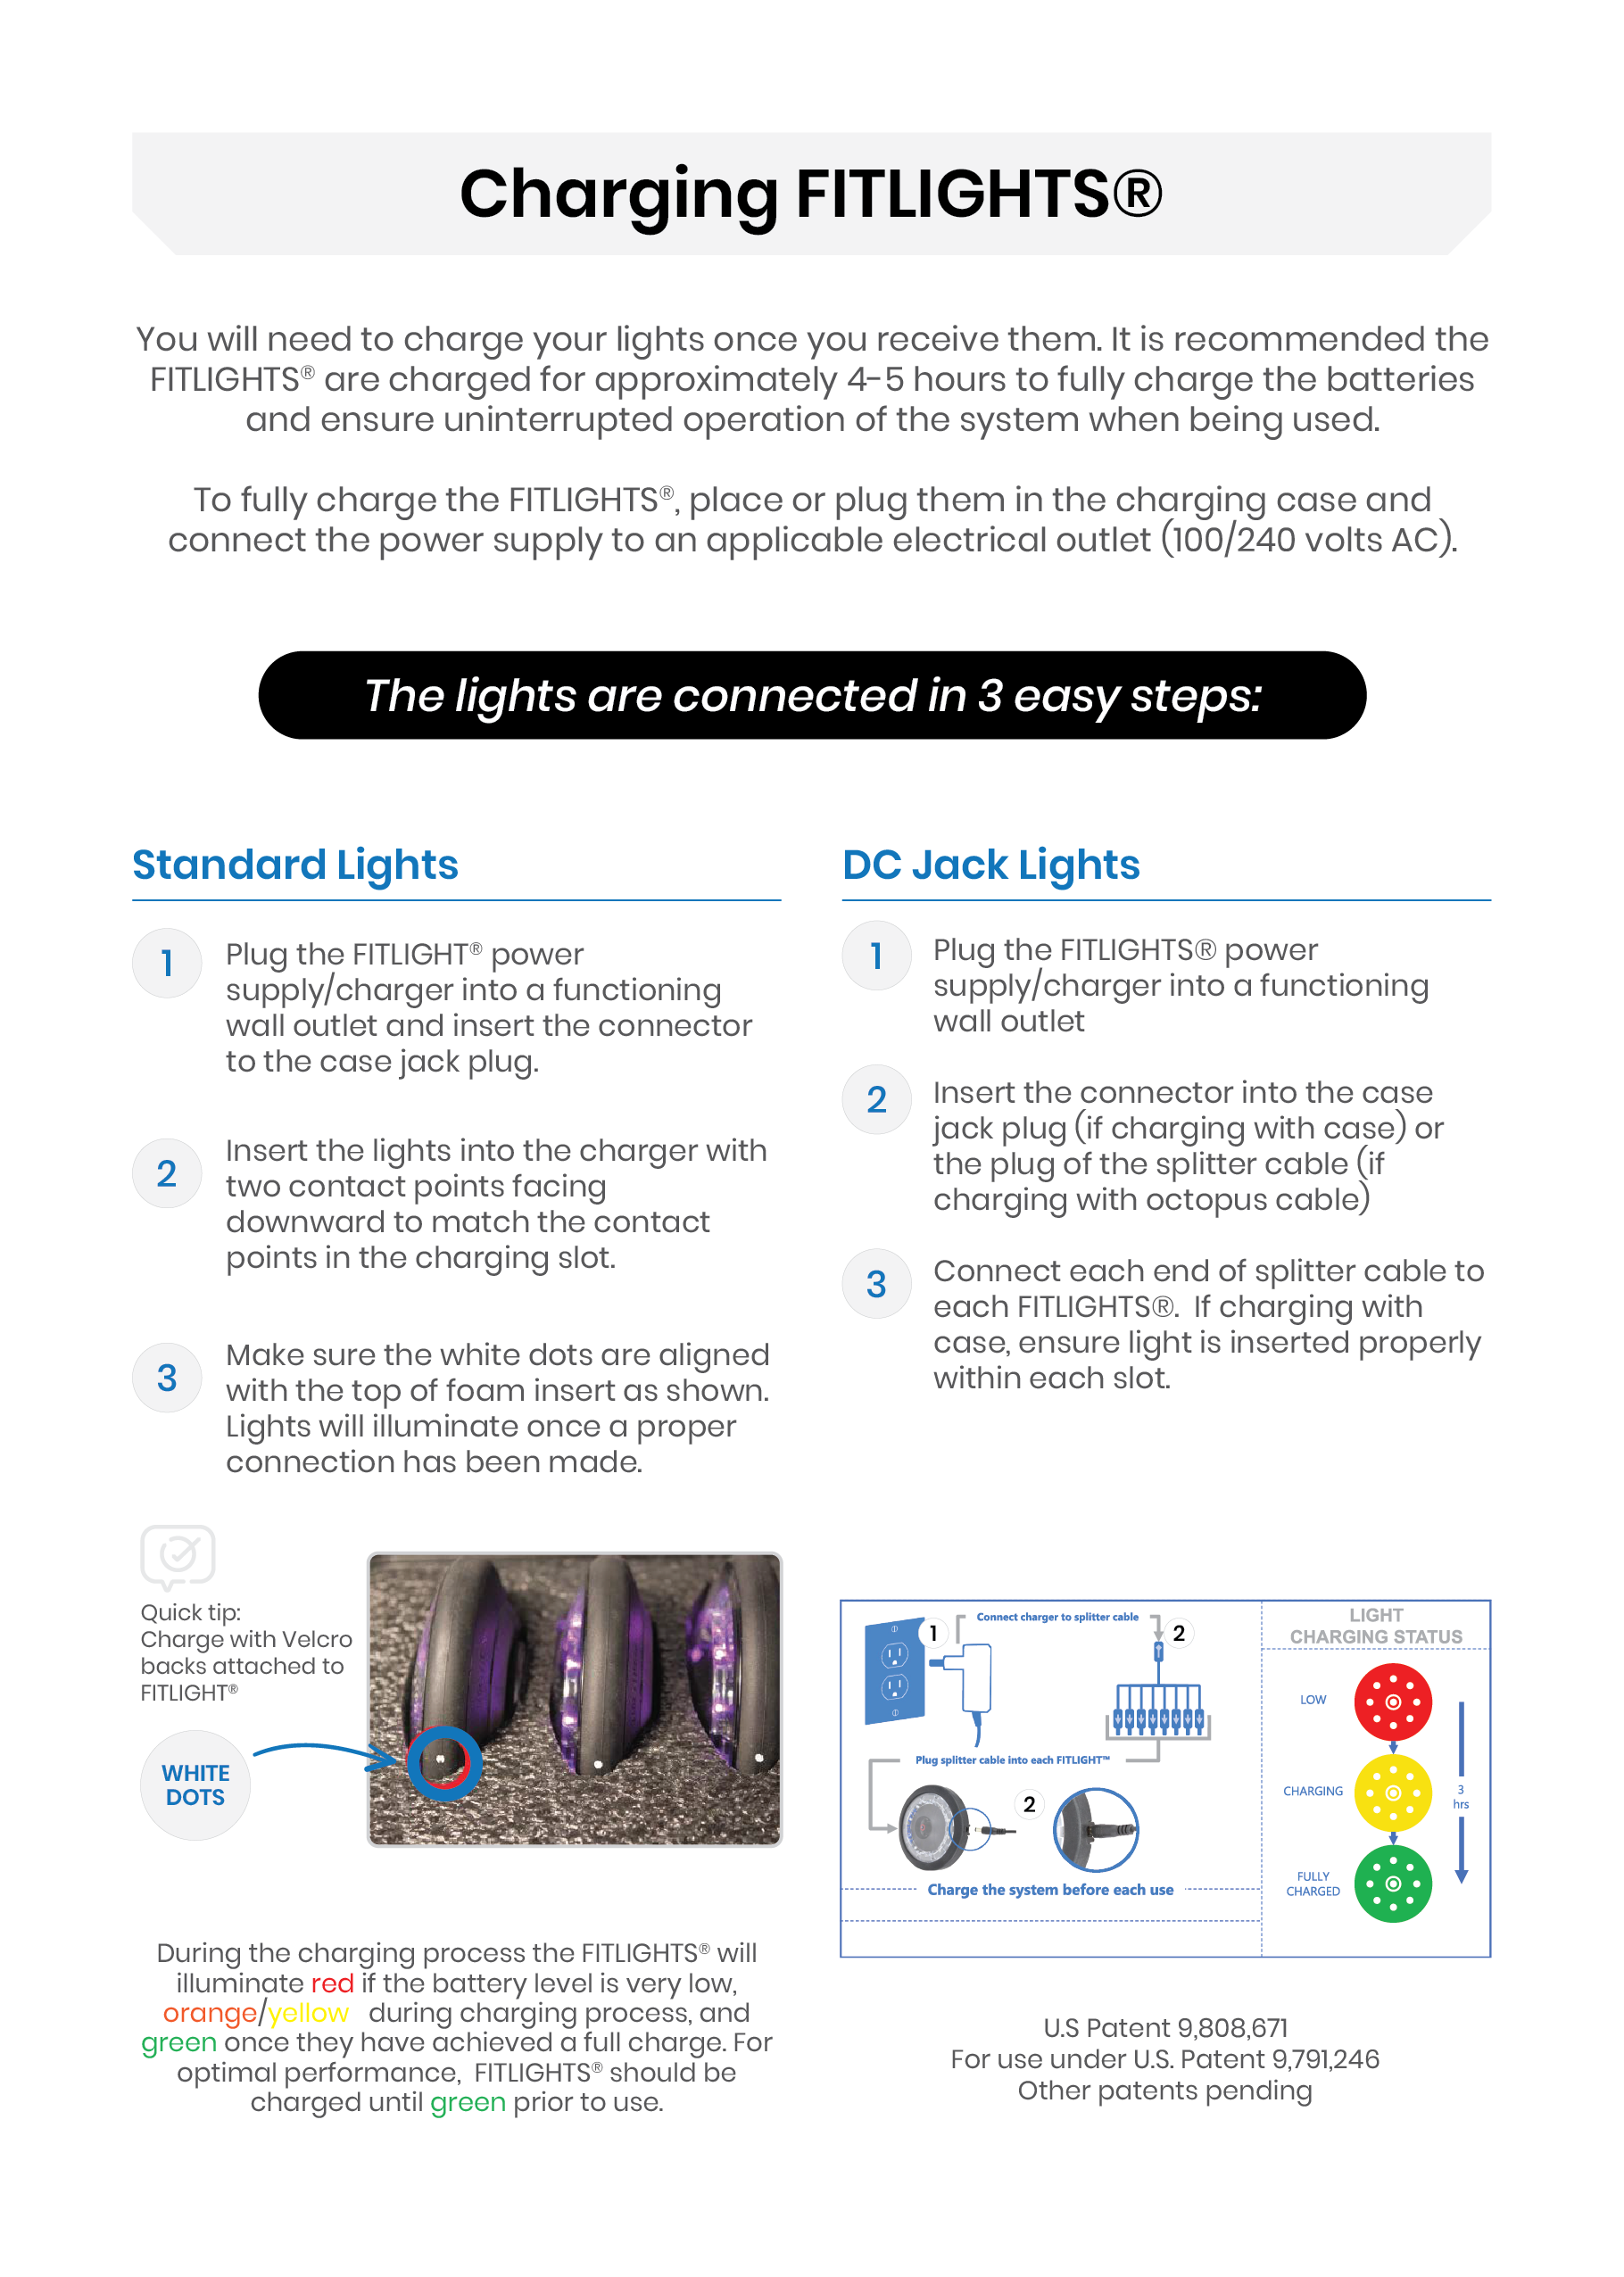
You can follow the steps below to charge your FITLIGHTS®:
If you have the DC/regular lights
These have a visible outlet in each light & a removable rubber cover.
1. Plug the charger/power supply onto a compatible wall outlet.
2. Insert the connecter into the octopus splitter cable plug, or the case jack plug.
3. Connect each of the splitter cables to each FITLIGHT®. Lights will illuminate an orange color when properly connected.
Please note if you are charging the lights and they are connected to the App or Tablet, they will not be illuminated nor show a color.
If you have the standard/pro lights
These have two metal contacts that are used for charging and can only be charged in a case.
1. Plug the charger/power supply onto a compatible wall outlet and Insert the connecter to the case jack plug.
2. Insert the lights into the charger by ensuring that the contact point faces downwards to match the contact point of the charging case.
3. Ensure that the white dot on FITLIGHT® aligns with the top of the foam. When it properly connects, the lights will illuminate.
Here is a video showing how to charge the lights in the hard case.
You can also take a look at the attached picture for more details.

Charging Notes:
1. The lights do not have switches and so they are always powered on.
2. If you charge the lights and they go green and you unplug the charger from the wall or power source, the lights will remain on even though you have disconnected the charging power.
For example: If you charge the lights until they are green and you unplug them at 8:00 am and you want to use them at 8: 00 PM, then the lights would have been on already for 12 hours. Therefore, it is important that you charge the lights before you use them following the guidelines.
4. The lights can remain under charge, and will draw minimal power and so they are always ready for when you need them.
5. The WiFi light will take approx. 4 to 4.5 hours to fully charge, meanwhile the non WiFi lights will be charged within 2 hours.
Please refer to the image below for further instructions:
Comments
0 comments
Please sign in to leave a comment.